Cat #: 33-GSC-WM
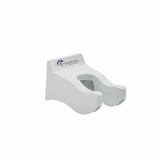
Genesee Scientific 33-GSC-WM Poseidon Single Pipettor Holder, Holds 1 Pipettor, 1 Pipettor Stand/Unit
Cat #: 33-GSC-WM
Genesee Scientific 33-GSC-WM Poseidon Single Pipettor Holder, Holds 1 Pipettor, 1 Pipettor Stand/Unit
Holds 1 Pipettor
1 Pipettor Stand/Unit
Brand: Poseidon- Holds one single or multichannel Poseidon pipettor
- Comes with double sided adhesive tape and screws to mount on the wall
- Attaches well to any smooth, dry surface
- Resistant to aggressive chemicals and UV light
- Made of heavy duty polycarbonate
$14.90
Login To Access Your Institutional Price
Holds 1 Pipettor
1 Pipettor Stand/Unit
Brand: Poseidon- Holds one single or multichannel Poseidon pipettor
- Comes with double sided adhesive tape and screws to mount on the wall
- Attaches well to any smooth, dry surface
- Resistant to aggressive chemicals and UV light
- Made of heavy duty polycarbonate
Your day to day tasks become easier when everything is in its place. The sole purpose of our pipettor wall mount is to keep your single and multichannel pipettes organized. You can either adhere the wall mount to a smooth, dry surface with the provided double adhesive tape or fasten it with the included screws. By storing your micropipettes upright, this prevents any liquids from seeping into your pipette shaft and causing damage to your instrument.
Brand | Poseidon |
---|---|
Color | White with Poseidon logo |
For Use With | Single and multichannel pipettors |
Positions | 1 |
Compatible Pipettors | Gilson Pipetman®, Poseidon |
If you are attaching the pipette holder to a smooth surface, we recommend using the adhesive tape. If the surface is rough and the pipette holder needs more security, we provide wall-plugs and screws.
Prior to installing the wall mount, please make sure the surface is clean and dry by using ethanol and water based solvent. Remove the backing from one side of the tape and stick it to the back of the single pipette holder. Then remove the backing from the other side of the tape and place the single pipettor holder at the required position and press hard against the surface. Please wait 24 hours for the tape to fully adhere.
Drill two holes at the appropriate position using a 6mm drill. Push a wall-plug into each of the two holes. Screw in the two screws leaving a 2mm gap between the heads of the screws and the wall. Position the single pipette holder back slots over the screws and push down to install it. Tighten the screws if necessary.
Enjoy our products? Leave a review and let us know.